
Find my latest tutorials on you tube!!
I 'm happy to share with you how I make projects. From start to finish, step by step I show you how I create them. Curious? You can find them here:

If you like them, give them a thumbs up and don't forget to subscribe to my channel so you don't have to miss a thing ^.^
*** *** ***
Aquarelcard using a stencil and a stamp
I 'm happy to share with you how I make projects. From start to finish, step by step I show you how I create them. Curious? You can find them here:
If you like them, give them a thumbs up and don't forget to subscribe to my channel so you don't have to miss a thing ^.^
*** *** ***
Aquarelcard using a stencil and a stamp

Step 1
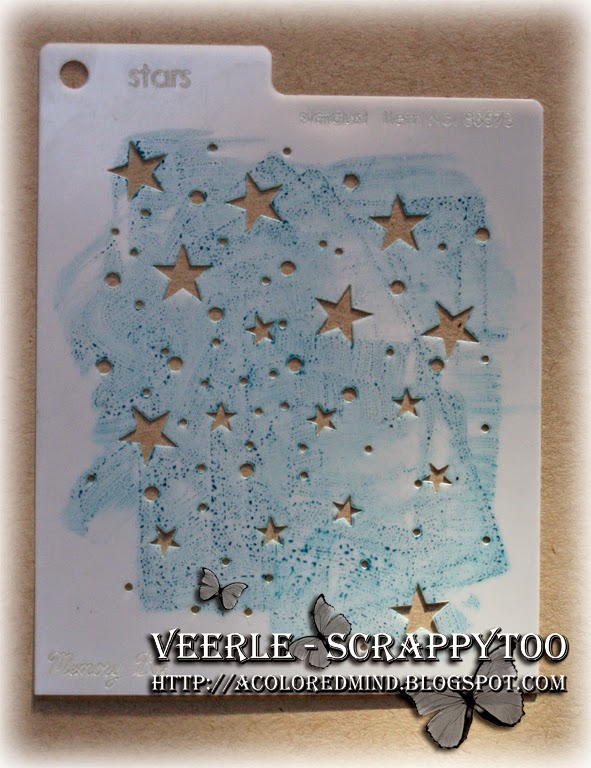
Ink up your stencil using a waterbased ink. Here I used Distressink ~ Broken china.
Breng inkt aan op je stencil die reageert op water. Hier gebruikte ik Disttressinkt ~ Broken China
Step 2
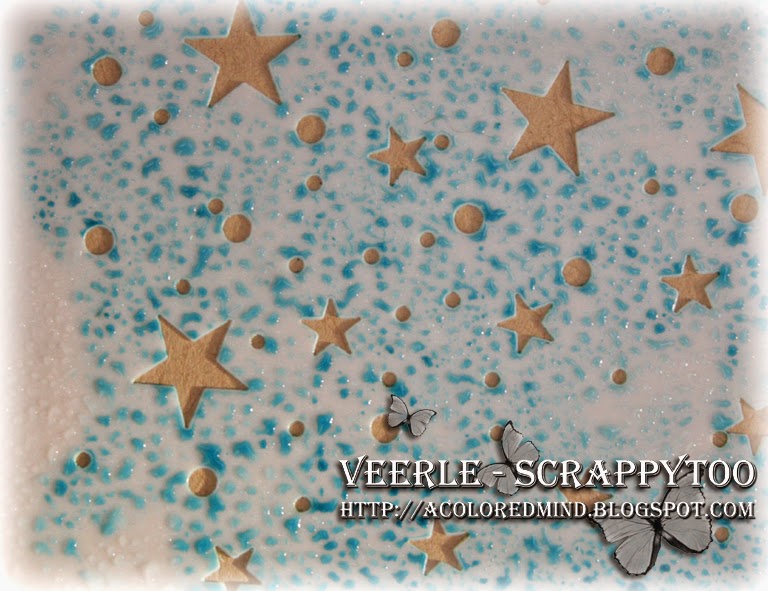
Spray water over the inked stencil.
Vernevel water over de inkt op de stencil.
Step 3
Lay your stencil onto your paper, inked face down. Push it down using a paper towel to absorb ink that would peak through the open pieces of the stencil. Remove the stencil carefully and roll over the card using a clean paper towel to absorb most of the water.
Leg je stencil met de inktzijde op je papier. Druk het aan met een rol keukenpapier om eventuele inkt op te nemen die door de openingen in het stencil komt piepen. Verwijder voorzichtig het stencil en rol opnieuw met een papier over het geheel om het teveel aan water op te nemen.

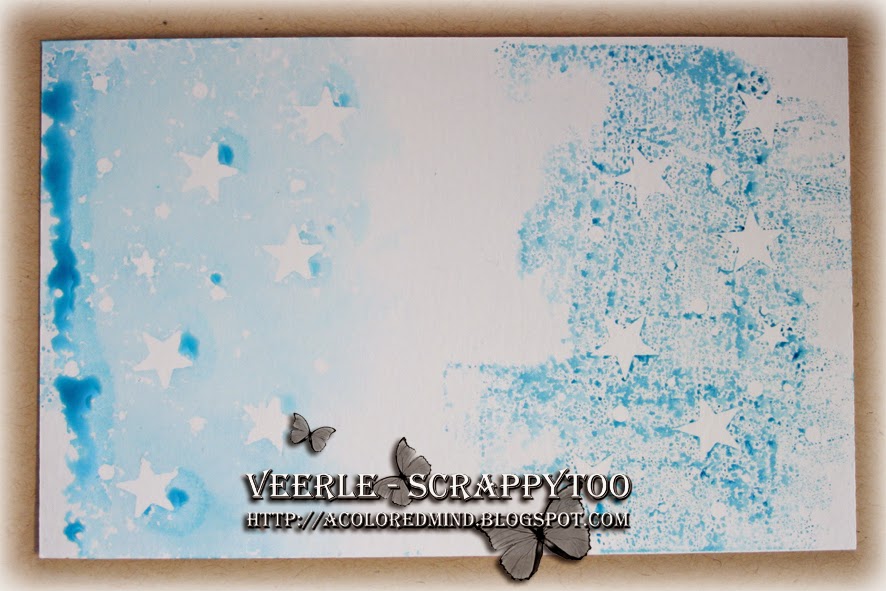
The amount of water sprayed over the stencil will determine the end result. To show you the difference between more or less water I made the next picture. At the left you see I used a lot of water. It gives a smooth result and a pool of water at the edge. If you remove your stencil it is necessary to roll over the paper with a paper towel to pick up this water.
At the right I only sprayed a little bit of water. You don't get the blending as you have on the left, but a "dotted" endresult.
Keep in mind that the paper is important also. I always work on watercolorpaper, this gives the ink and water the chance to move, other papers could suck up your water and ink faster giving less of blending.
De hoeveelheid water die je over je stencil sprayed zal het eindresultaat zeker beïnvloeden. Om het verschil tussen meer en minder water duidelijk te maken heb ik onderstaande foto gemaakt.
Aan de linkerkant zie je een stencil dat meer water kreeg. Je ziet dat de inkt mooi in elkaar is overgevloeid. En als je het stencil verwijdert krijg je een watervlek die je makkelijk kan opnemen door er met een keukenrol overheen te rollen.
Aan de rechterkant heb ik weinig water over de stencil gesprayed. Je ziet dat de inkt nu gewoon in vlekjes op het papier is achtergebleven en niet in elkaar is overgevloeid.
Hou er ook rekening mee op welk papier je werkt. Ik werk steeds op aquarelpapier voor deze techniek waardoor de inkt kans krijgt om te bewegen, gewoon papier kan je inkt en water sneller "opzuigen" waardoor je minder reactie krijgt.
To stamp the trees on the card we're using the same technique only using a stamp this time. Ink the stamp up and spray it with water.
Om de kerstbomen op de kaart te stempelen gebruiken we dezelfde techniek. Beïnkt de stempel en vernevel hierover een laagje water.
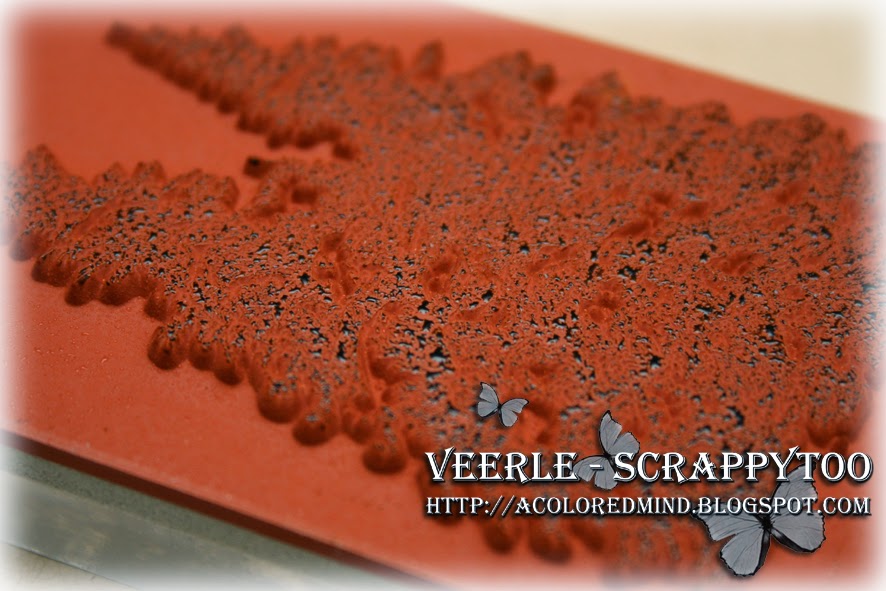
I made another picture to show the result of using less or more water. On the left I used more water, on the right I used less water.
Ik maakte opnieuw een foto om het verschil te laten zien in de afdruk als je meer of minder water gebruikt. Aan de linkerkant is er meer water vernevelt, aan de rechterkant minder water.
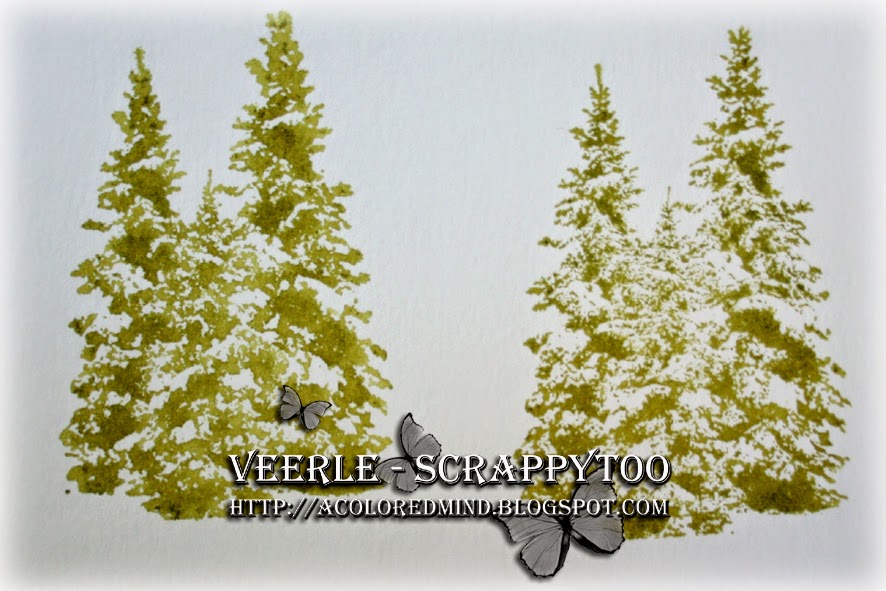
And before you know it...you have lots of backgrounds ready to make lots of cards ;-)
En voor je het weet heb je heel snel veel achtergrondjes voor je kerstkaarten.

The used stencil: memorybox ~stardust

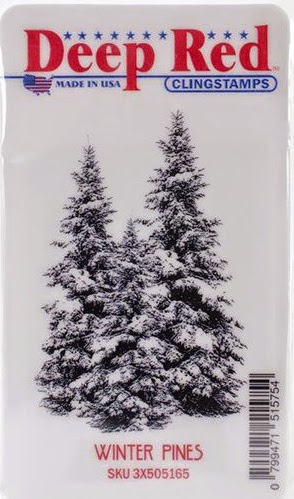
The used stamp: Deep Red ~Winter pines
***** ***** *****

helemaaaaal duidelijk ! super, een 'aha erlebenis' werd het ! superhartelijk dank je wel, ga zeker wel een keertje uitproberen ! mercikes
BeantwoordenVerwijderengrtjs,martina
x
Heel erg mooi!! Bedankt voor de tutorial!!
BeantwoordenVerwijderenGroetjes
Maria